Calendars (Enhanced Time Intelligence)
The September 2025 release of Power BI Desktop introduced a new Public Preview feature called Enhanced Time Intelligence (also known as Calendar-based Time Intelligence). This feature lets you define custom calendars in your semantic model, enabling time intelligence calculations across diverse calendar systems such as fiscal, retail (4-4-5, 4-5-4, 5-4-4), ISO, and other non-Gregorian calendars.
Unlike classic time intelligence functions that assume a standard Gregorian calendar, the new calendar-based functions derive their behavior from explicit column mappings you define in your Date table. This approach also introduces week-level time intelligence calculations that were difficult to perform previously.
For more information about how calendar-based time intelligence works, see:
- Introducing Calendar-based Time Intelligence in DAX (SQLBI)
- Calendar-based Time Intelligence Preview (Microsoft)
Defining a Calendar
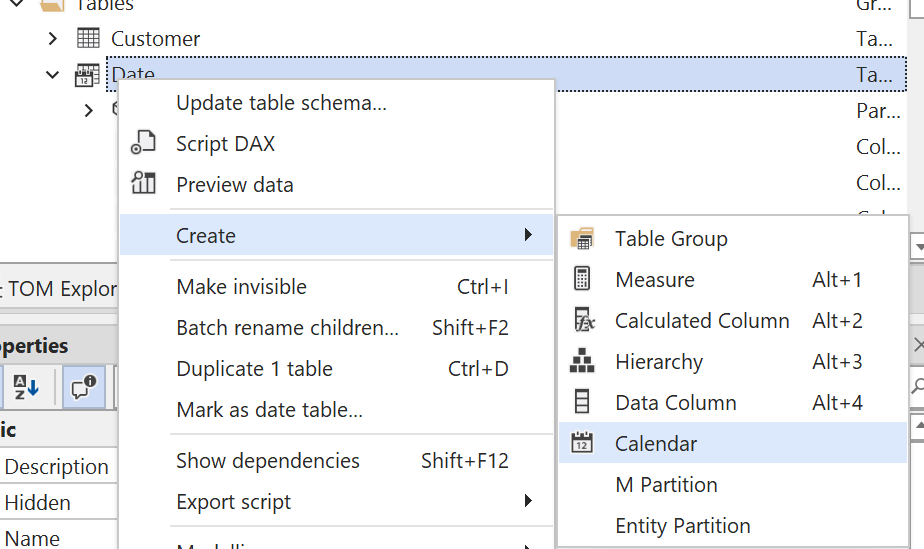
- Right-click on a table in your model (typically a Date table) and select Create > Calendar....
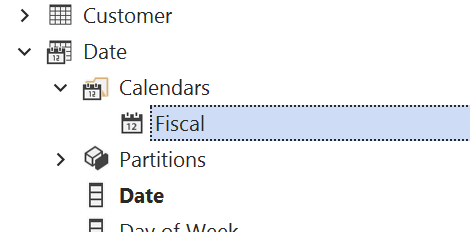
- Give your calendar a name, e.g.
Fiscal.
Once calendars are added to a table, they will be shown in the TOM Explorer under the Calendars node:
Before you can use a calendar in your DAX calculations, you need to configure it by mapping columns in the table to the appropriate time unit categories.
The Calendar Editor
The January 2026 release of Tabular Editor 3 introduced a dedicated Calendar Editor that provides a comprehensive interface for configuring calendars. The editor displays all time unit categories in a structured grid with helpful tooltips, and performs real-time validation to help you avoid configuration errors.
Opening the Calendar Editor
You can open the Calendar Editor in any of the following ways:
- Double-click an existing calendar under a table in the TOM Explorer.
- Right-click an existing calendar under a table in the TOM Explorer and choose Edit Calendar....
- Select a calendar in the TOM Explorer, then open the Calendar menu and choose Edit Calendar....
- Open the View menu and choose Calendar Editor.
Layout of the Calendar Editor
The Calendar Editor is split into two main areas:
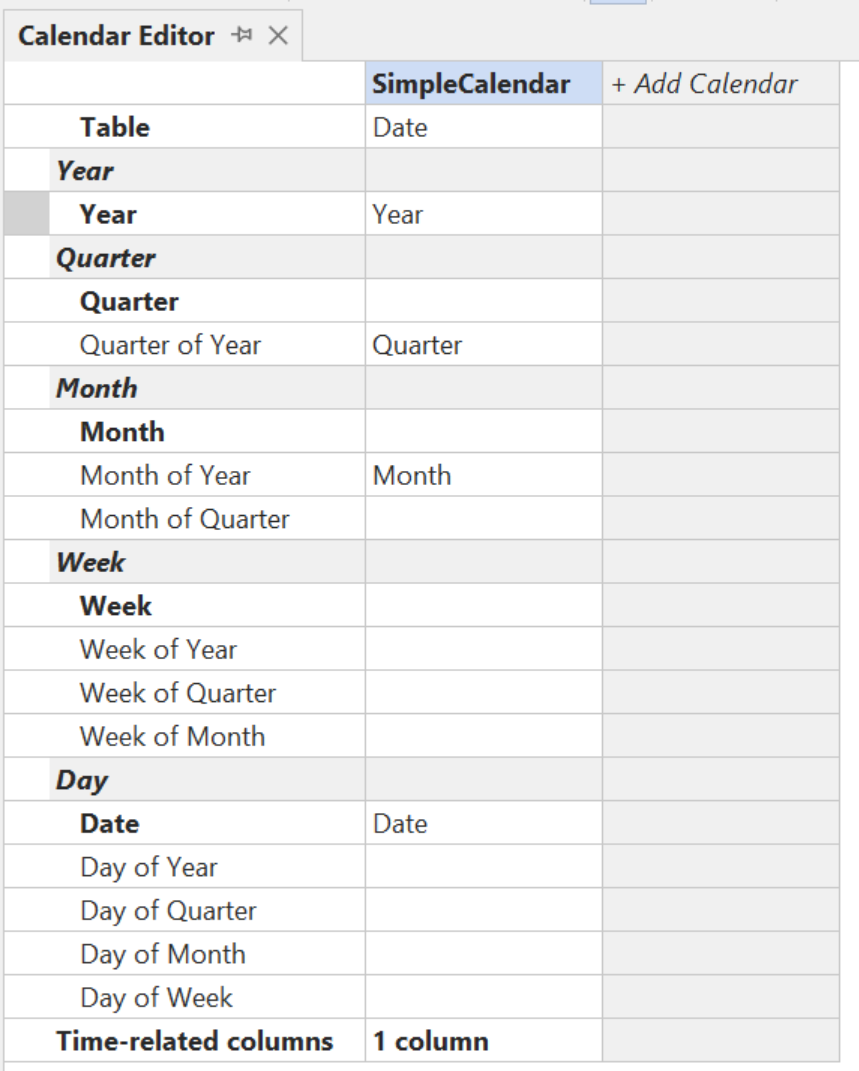
Calendars grid (left panel) A vertical grid where each calendar is displayed as a column and time unit categories are displayed as rows. The rows are organized hierarchically by Year, Quarter, Month, Week, and Day. In this grid you can:
- Select the table that the calendar should get its columns from (typically a Date table) in the Table row.
- Map columns to time unit categories by selecting from the dropdown in each cell.
- See real-time validation feedback via icons and tooltips.
- Create additional calendars using the + Add Calendar column (if your model requires multiple calendar definitions).
- Rename calendars by editing the name directly in the grid.
- Delete calendars by right-clicking on a calendar column.
Context panel (right panel) A detail panel that changes based on your selection in the calendars grid:
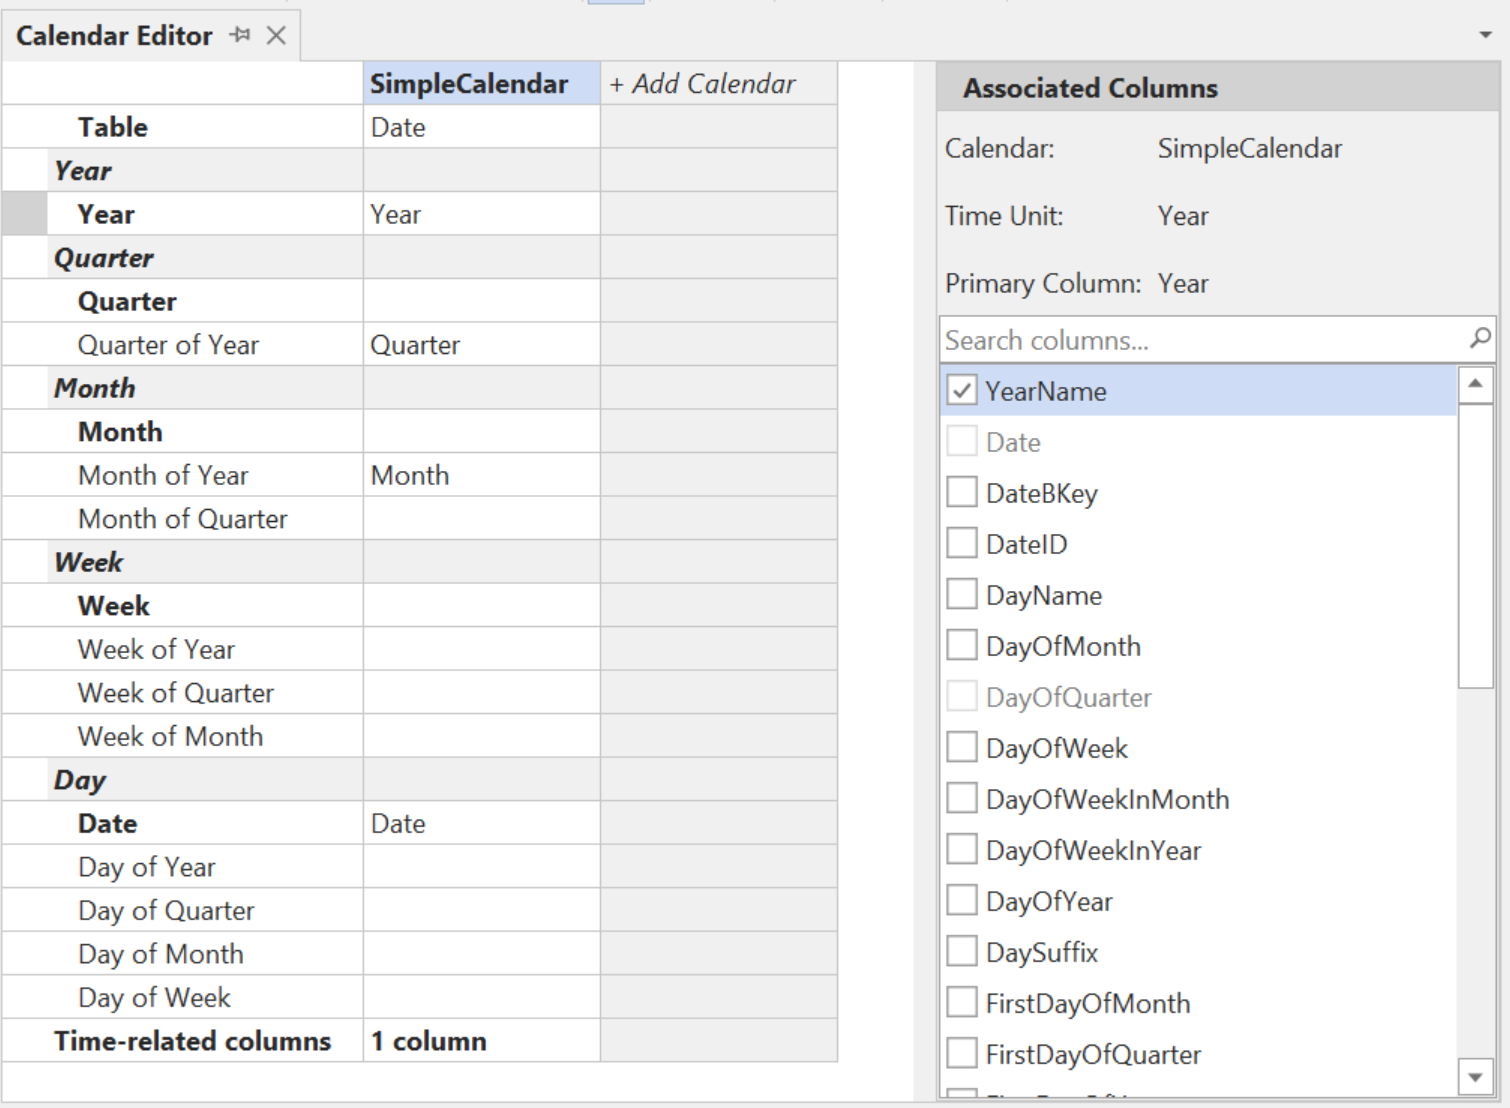
- Associated Columns: When you select a time unit row that has a column mapped, this panel lets you select additional associated columns.
- Time-Related Columns: When you select the "Time-related columns" row at the bottom of the grid, this panel lets you mark columns as time-related.
Mapping Columns to Time Units
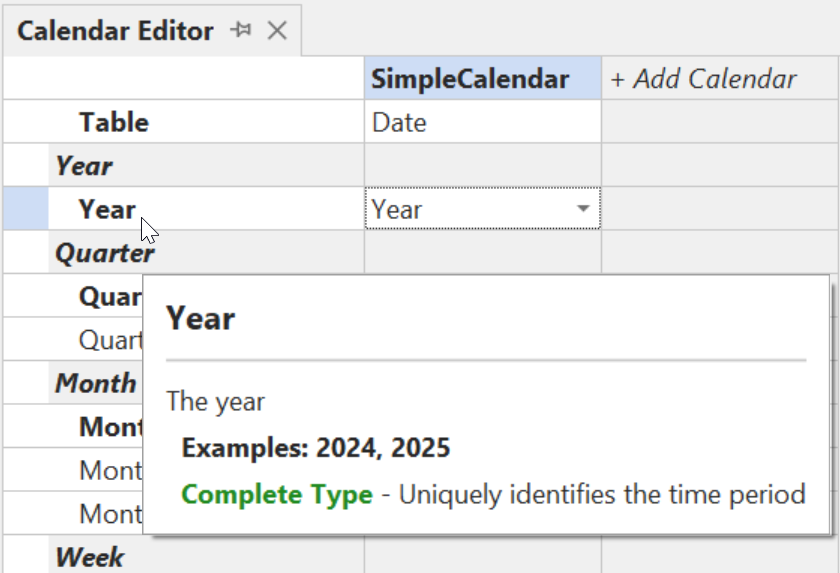
The calendars grid displays all available time unit categories. To map a column to a time unit, click on a time-unit cell under a calendar column in the grid. This opens a dropdown where you can select the primary column for that time unit.

You don't need to map every time unit—only the ones that apply to your calendar structure and for which your table has appropriate columns.
Time units are divided into complete categories (which uniquely identify a period on their own) and partial categories (which require a parent time unit to be mapped first). Hover over any time unit row to see a tooltip describing the expected data format and examples.
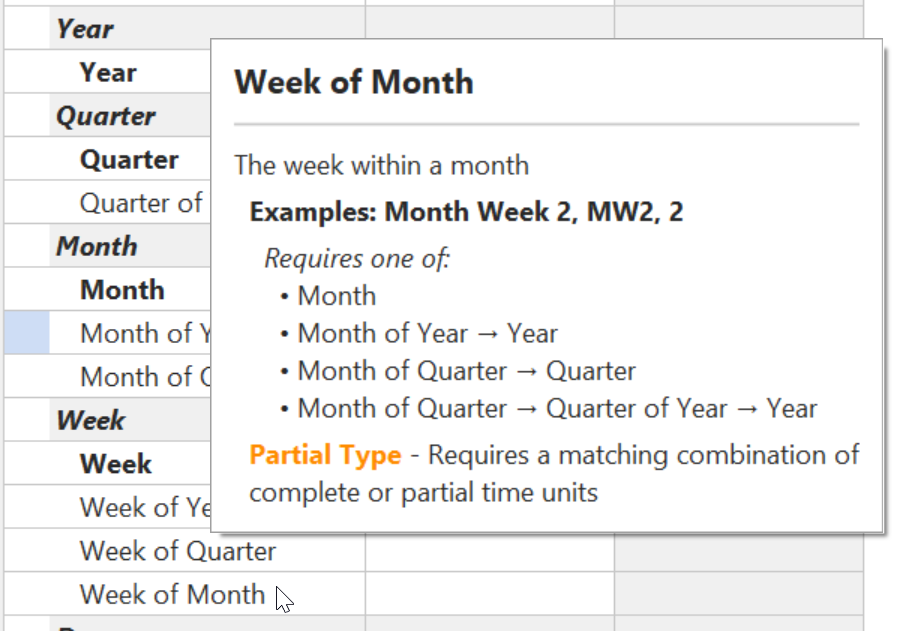
For partial time units, the tooltip also shows which parent time units must be mapped:
Example: Using Partial Time Units
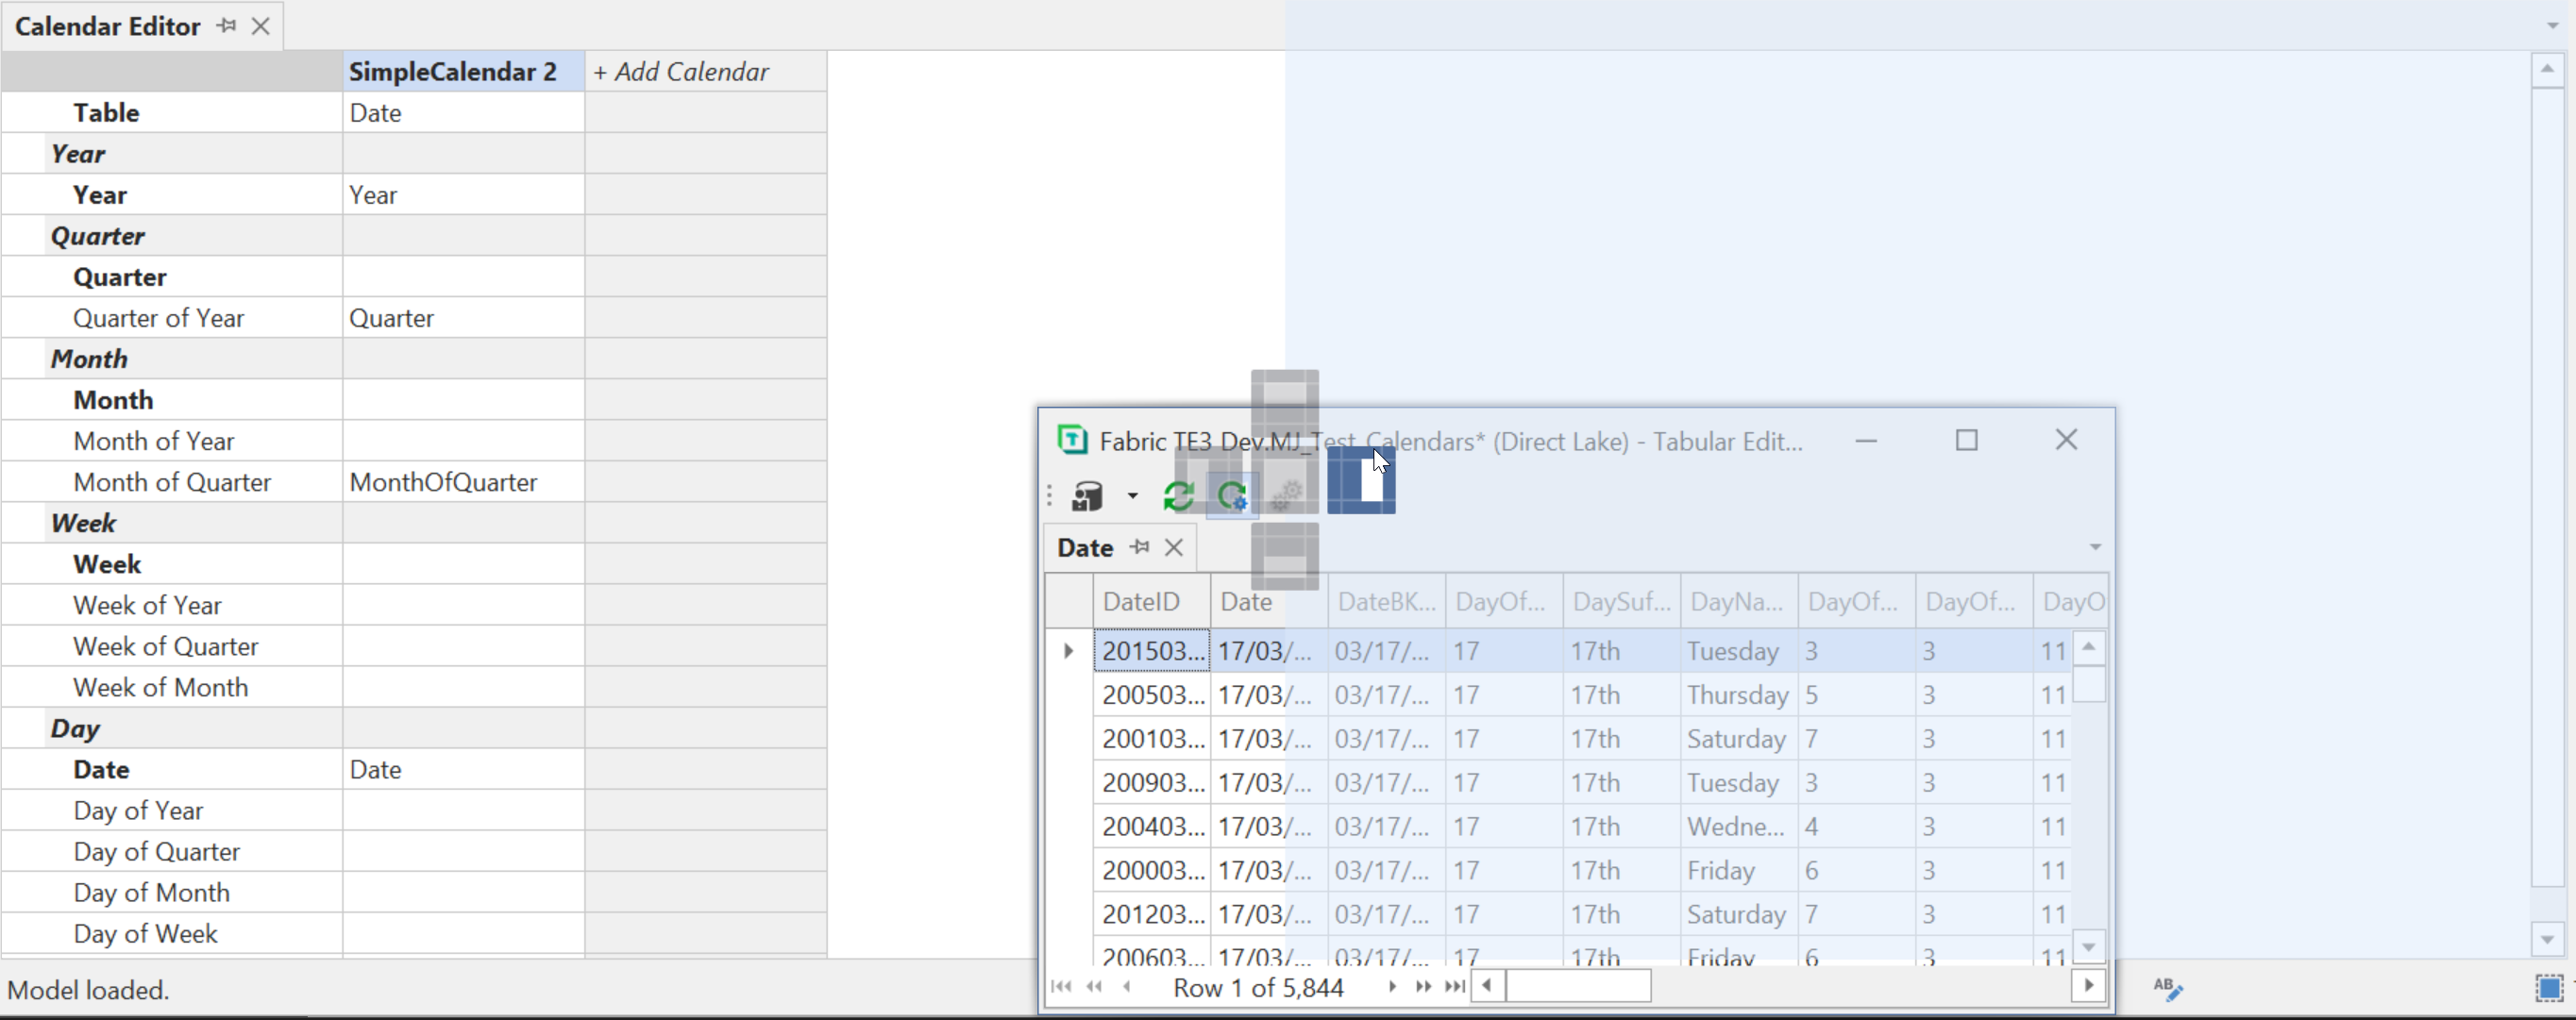
In some cases, your Date table may not have columns that uniquely identify complete time units like Quarter or Month (e.g., "Q1 2024" or "January 2024"). Instead, you might have columns like QuarterOfYear (1-4) and MonthOfYear (1-12) that only make sense when combined with a Year column.
In this scenario, you can map the partial time units (Quarter of Year, Month of Year) along with the Year complete time unit. This is a valid configuration because the partial time units can derive their full context from the Year mapping.

Tip
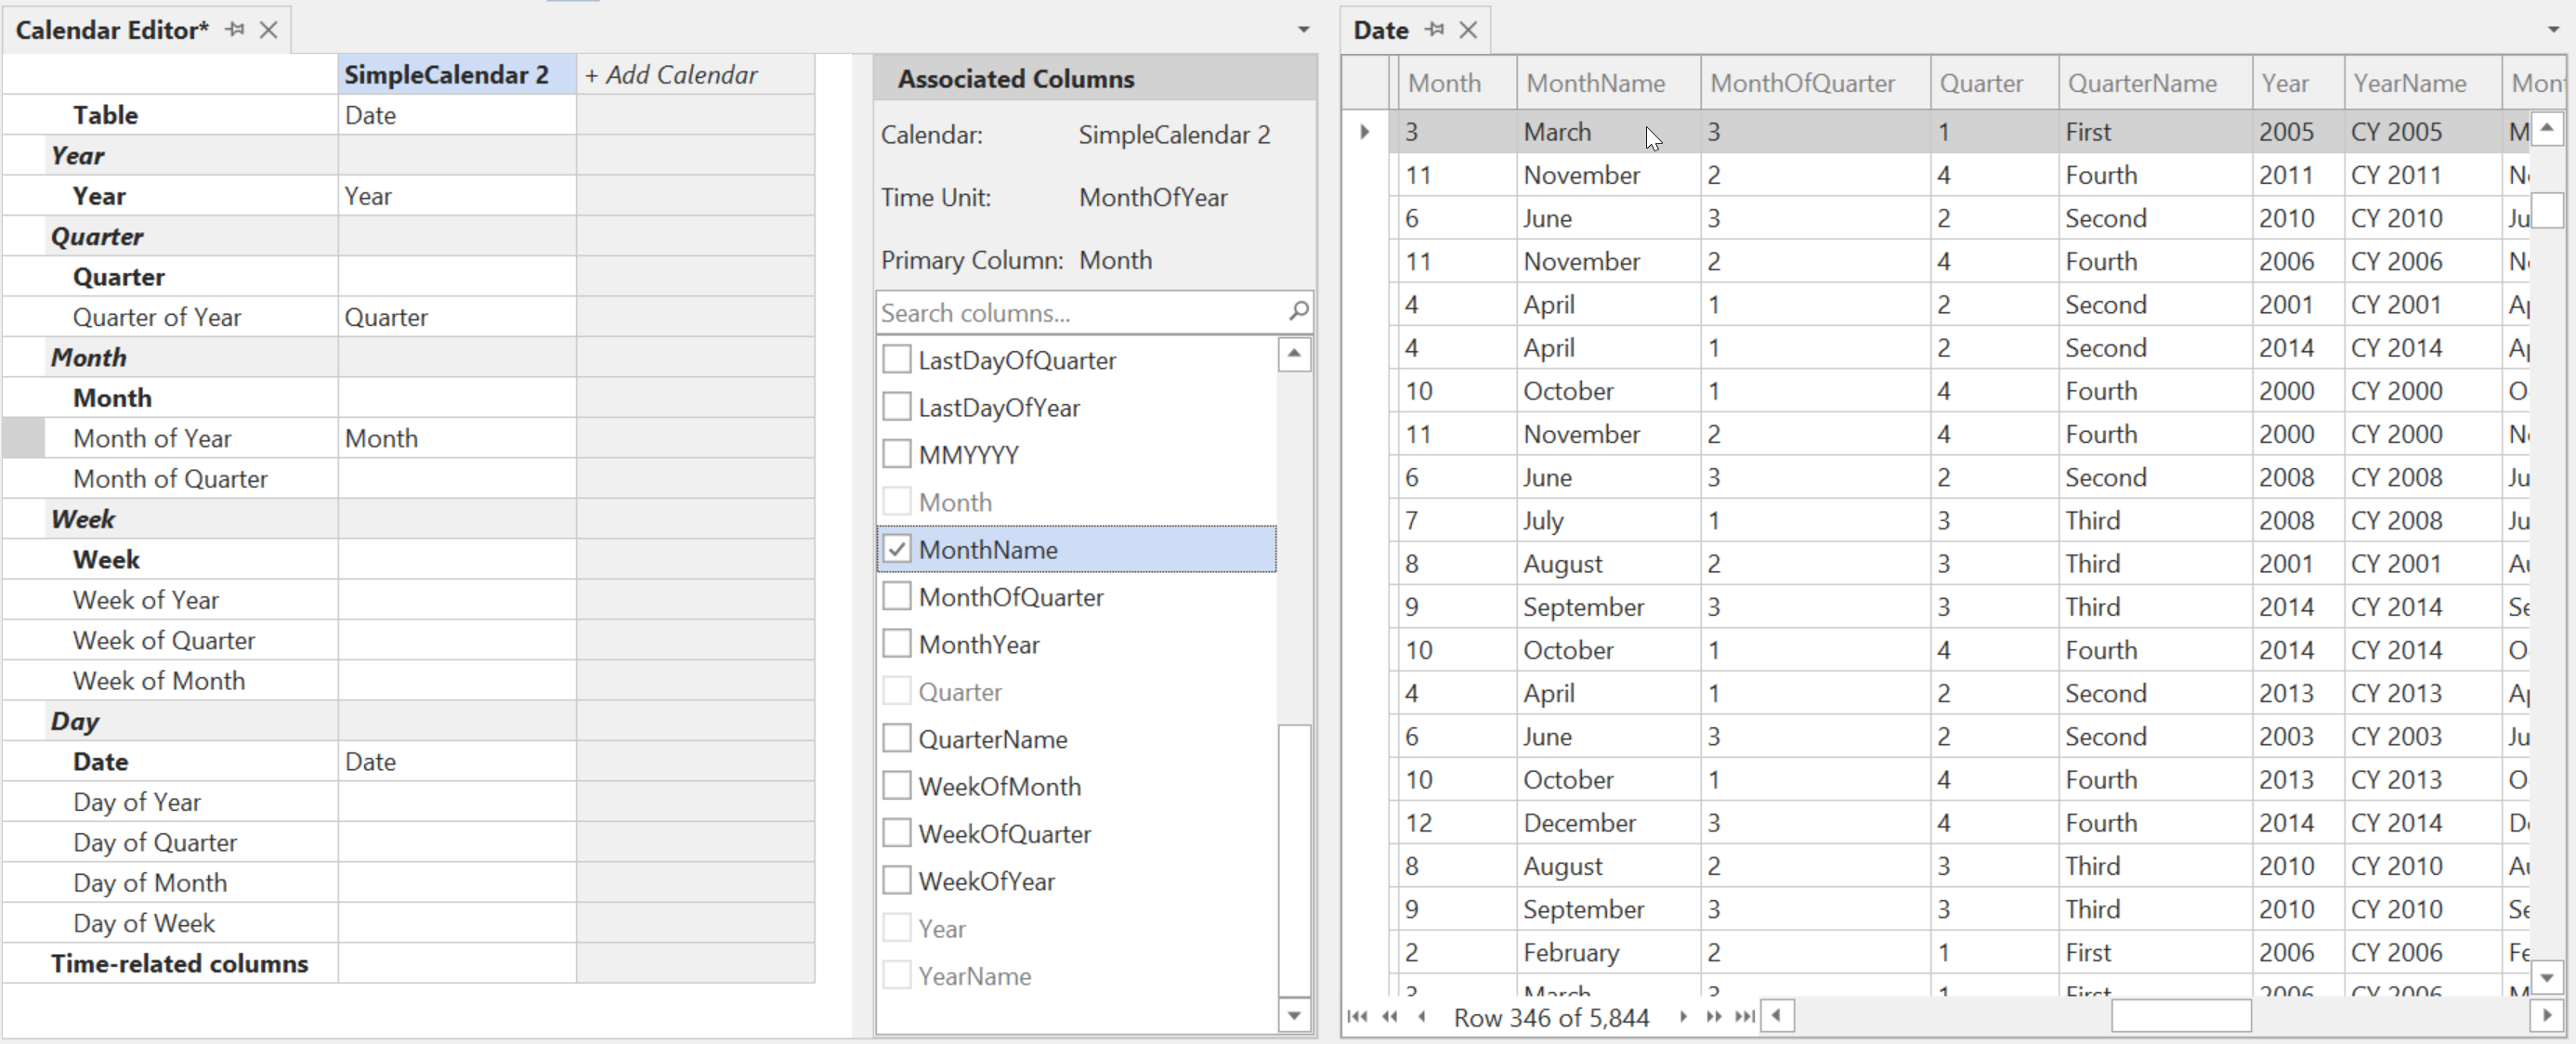
To see the available columns and their values while configuring your calendar, right-click on your Date table in the TOM Explorer and choose Preview Data.
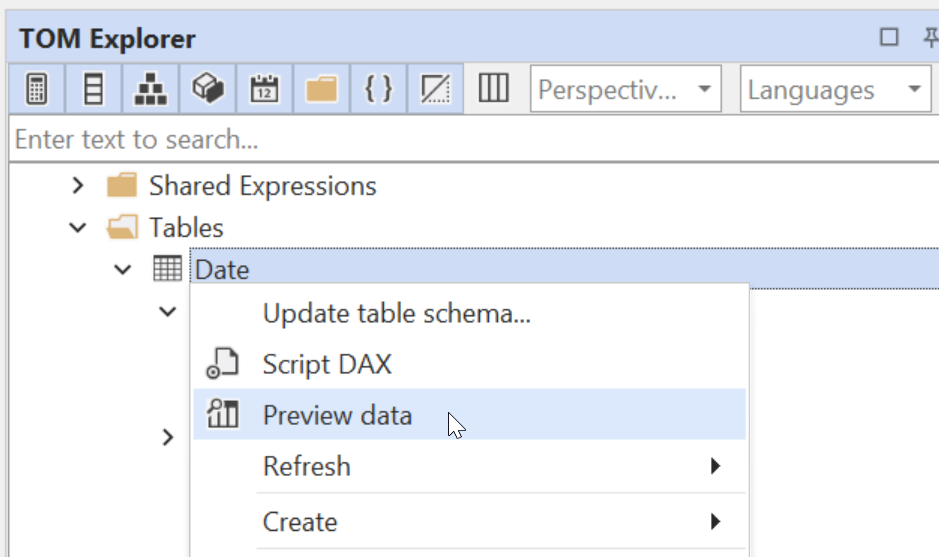
You can then dock the Data Preview window next to the Calendar Editor for easy reference.
Alternatively, you can use the DAX Query window to query your Date table and keep it visible alongside the Calendar Editor.
With the Date table preview docked, you can see the column values as you configure your calendar:
Complete Time Units:
| Time Unit | Description | Examples |
|---|---|---|
| Year | The year | 2024, 2025 |
| Quarter | The quarter including the year | Q1 2024, Q2 2025 |
| Month | The month including the year | January 2023, 2024 Feb |
| Week | The week including the year | Week 50 2023, W50-2023 |
| Date | The date | 12/31/2025, 4/3/2023 |
Partial Time Units (require a parent time unit to be mapped):
| Time Unit | Description | Examples | Requires | Or requires one of |
|---|---|---|---|---|
| Quarter of Year | The quarter of the year | Q1, Quarter 2, YQ1 | Year | |
| Month of Year | The month of the year | January, M11, 11 | Year | |
| Month of Quarter | The month within a quarter | 1, QM2 | Quarter |
|
| Week of Year | The week of the year | Week 50, W50, 50 | Year | |
| Week of Quarter | The week within a quarter | QW10, 10 | Quarter |
|
| Week of Month | The week within a month | MW2, 2 | Month |
|
| Day of Year | The day of the year | 365, D1 | Year | |
| Day of Quarter | The day within a quarter | QD2, 50 | Quarter |
|
| Day of Month | The day of the month | MD10, 30 | Month |
|
| Day of Week | The day of the week | WD5, 5 | Week |
|
Associated Columns
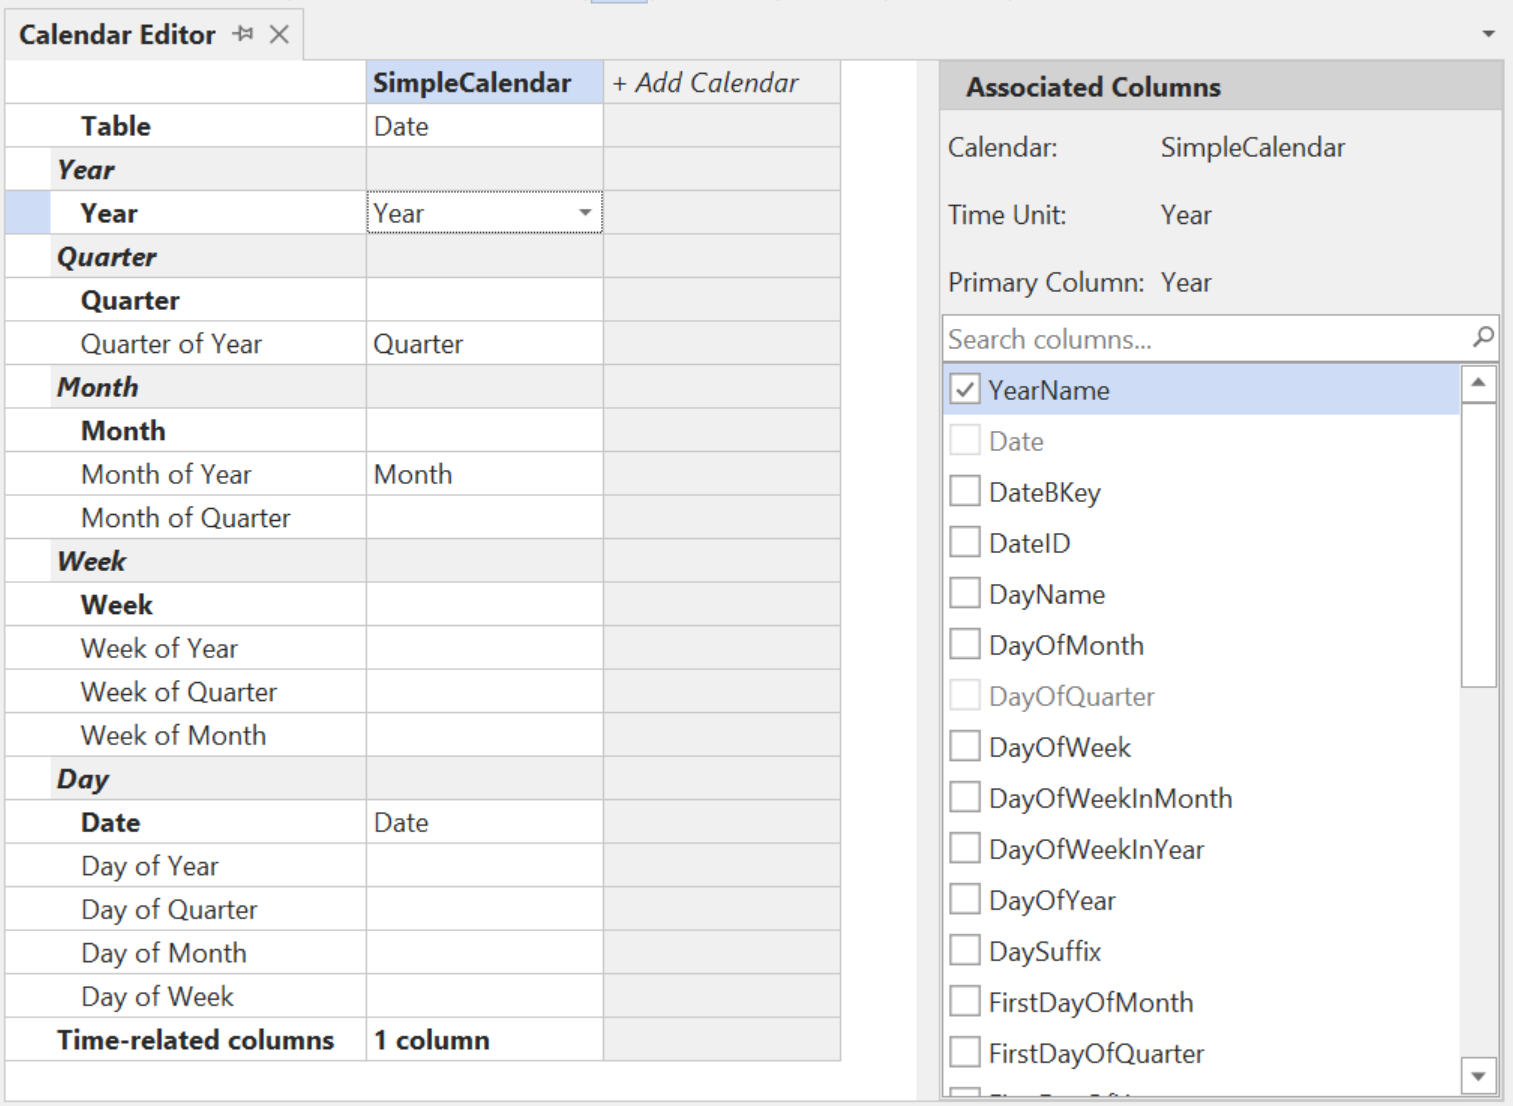
When you map a column to a time unit, that column becomes the primary column for that time unit. You can optionally add associated columns that represent the same time unit in a different format.
For example, if you map a numeric MonthNumber column (containing values 1-12) to "Month of Year", you might also want to associate a MonthName column (containing "January", "February", etc.) with the same time unit. Both columns represent the same concept, but in different formats.
To add associated columns:
- Select a time unit row in the grid that has a column mapped.
- In the Associated Columns panel on the right, check the columns you want to associate with that time unit.
Associated columns receive the same filter behavior as the primary column during time intelligence calculations.
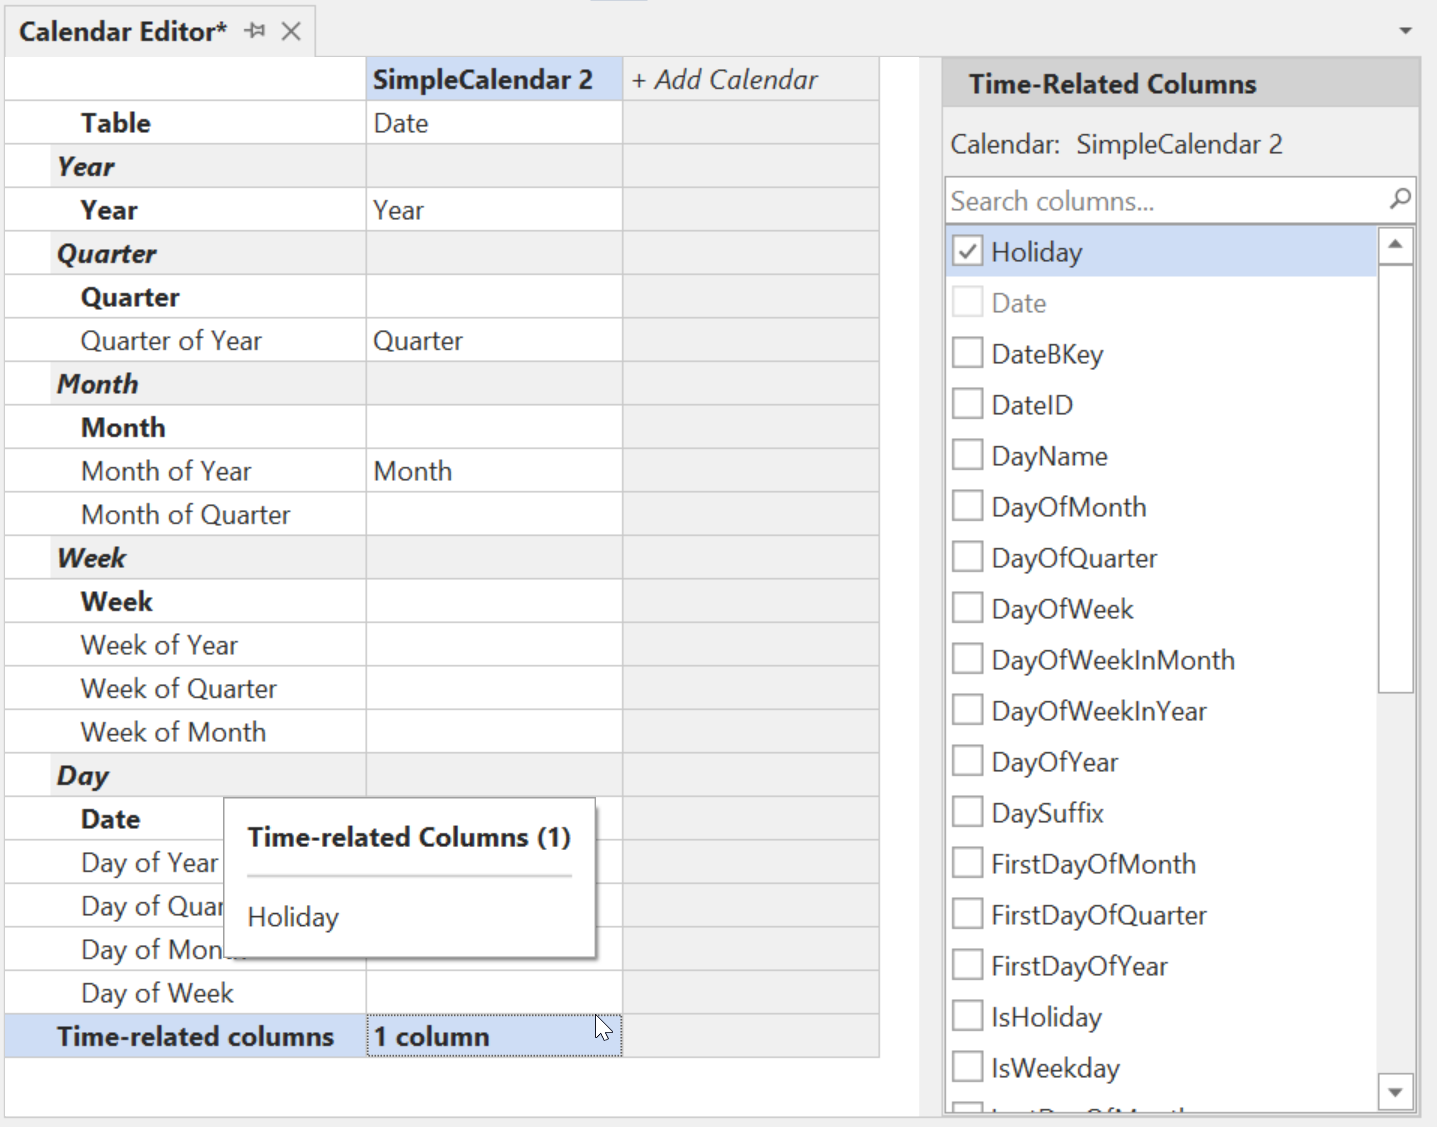
Time-Related Columns
In addition to mapping columns to specific time unit categories, you can mark columns as time-related. Time-related columns are columns in your Date table that don't fit into a specific time unit category but should still receive special treatment during time intelligence calculations.
Examples of time-related columns include:
IsHoliday- A flag indicating whether the date is a holidayIsWeekday- A flag indicating whether the date is a weekdayFiscalPeriodName- A descriptive label for the fiscal period
How time-related columns behave:
- During lateral shifts (such as
DATEADDorSAMEPERIODLASTYEAR), filters on time-related columns are preserved, maintaining the same granularity. - During hierarchical shifts (such as
DATESYTDorNEXTMONTH), filters on time-related columns are cleared.
To configure time-related columns:
- Select the Time-related columns row at the bottom of the calendars grid.
- In the Time-Related Columns panel on the right, check the columns you want to mark as time-related.
Applying Changes
Changes made in the Calendar Editor are applied to the local model (but not saved to disk) in two ways:
- Click the Accept button in the toolbar to apply changes to the local model.
- Changes are also automatically applied when you navigate away from the Calendar Editor (losing focus from the view).
You can discard pending changes by clicking the Cancel button before navigating away.
To persist the changes, save the model.
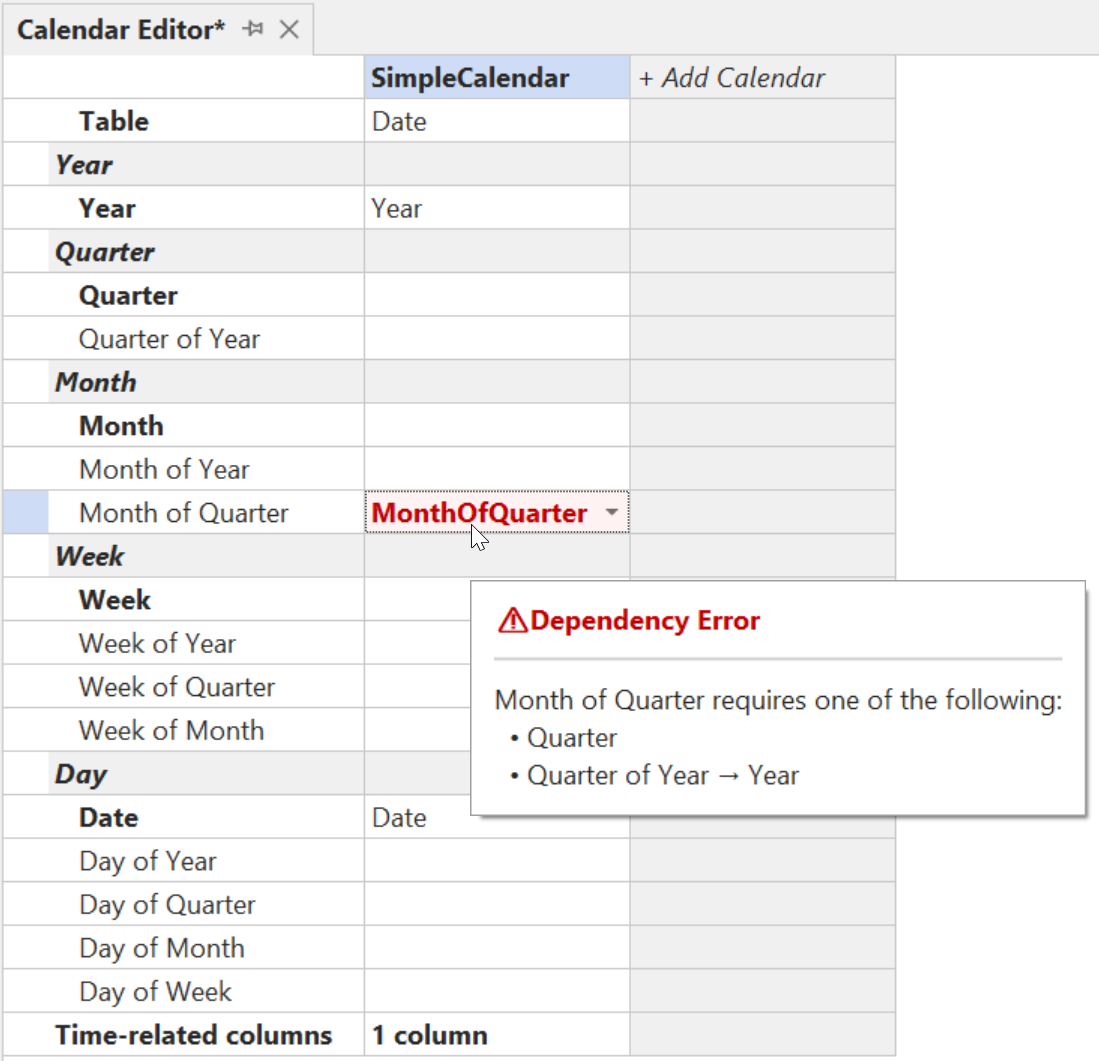
Real-Time Validation
The Calendar Editor performs real-time validation as you configure your calendars. Validation feedback is displayed via icons and tooltips directly in the grid, helping you identify and resolve issues before saving.
The following rules are enforced:
Unique calendar name Each calendar must have a unique name in the semantic model. If you create a calendar with a duplicate name, the editor automatically appends a suffix (e.g., "(1)") to ensure uniqueness.
Time unit dependency validation Partial time units require their parent time units to be mapped. For example, if you map a column to "Day of Month", you must also map a column to "Month" (or to "Month of Year" + "Year", etc.). The editor highlights cells with missing dependencies and displays a tooltip explaining which parent time units are required.
Cross-calendar category consistency If your model contains multiple calendars, a column must be associated with the same time unit category across all calendars. For example, if you map a
FiscalYearcolumn as "Year" in one calendar, you cannot map the same column as "Week of Year" in another calendar.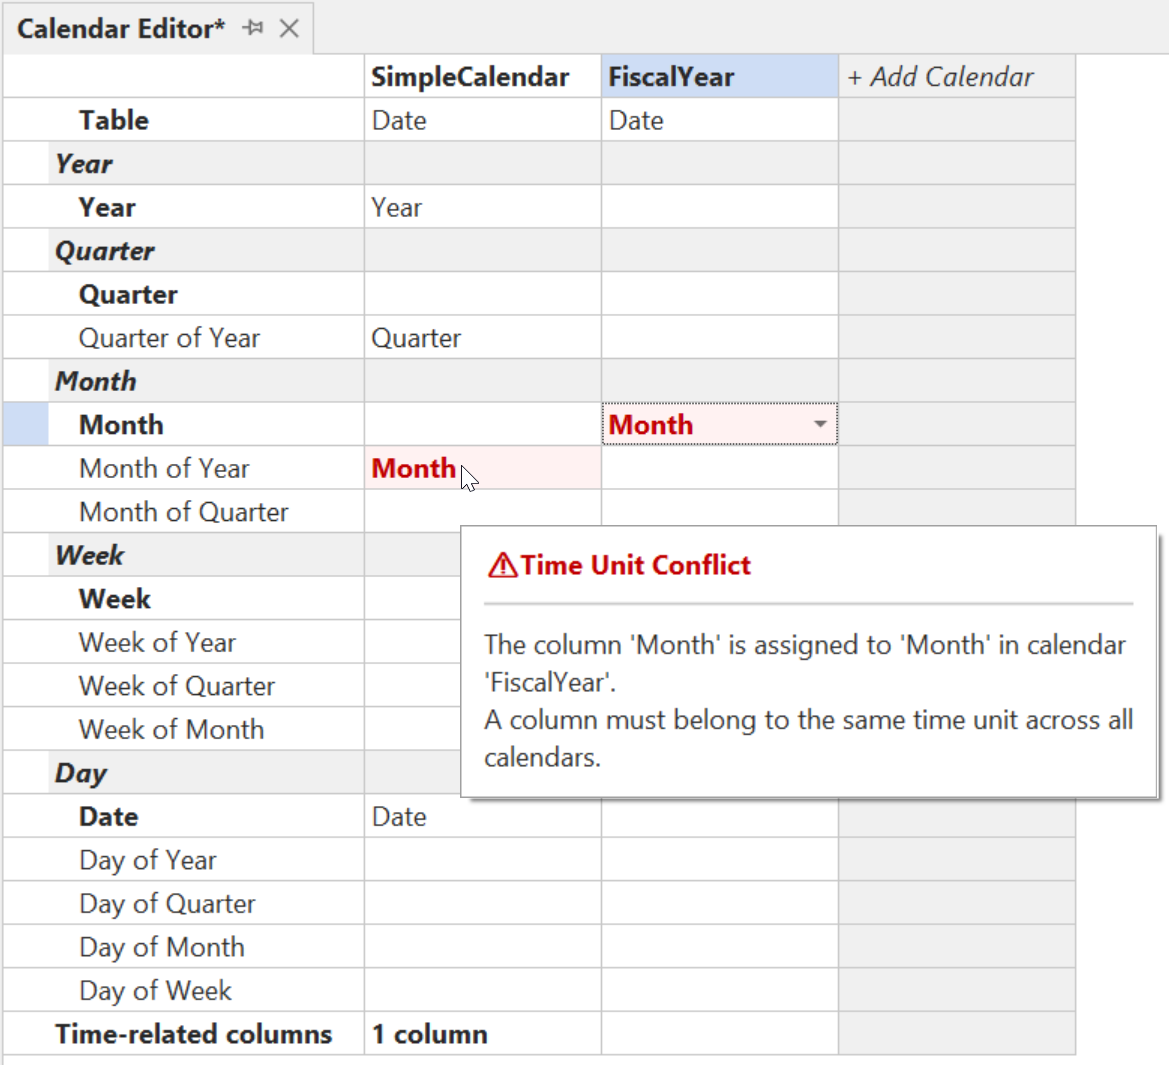
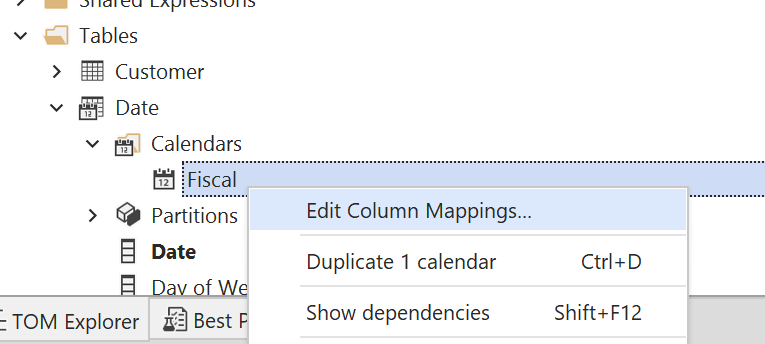
Configuring Calendars with the Column Mappings Dialog
As an alternative to the Calendar Editor, you can configure a calendar by right-clicking on it in the TOM Explorer and choosing the Edit Column Mappings... option:
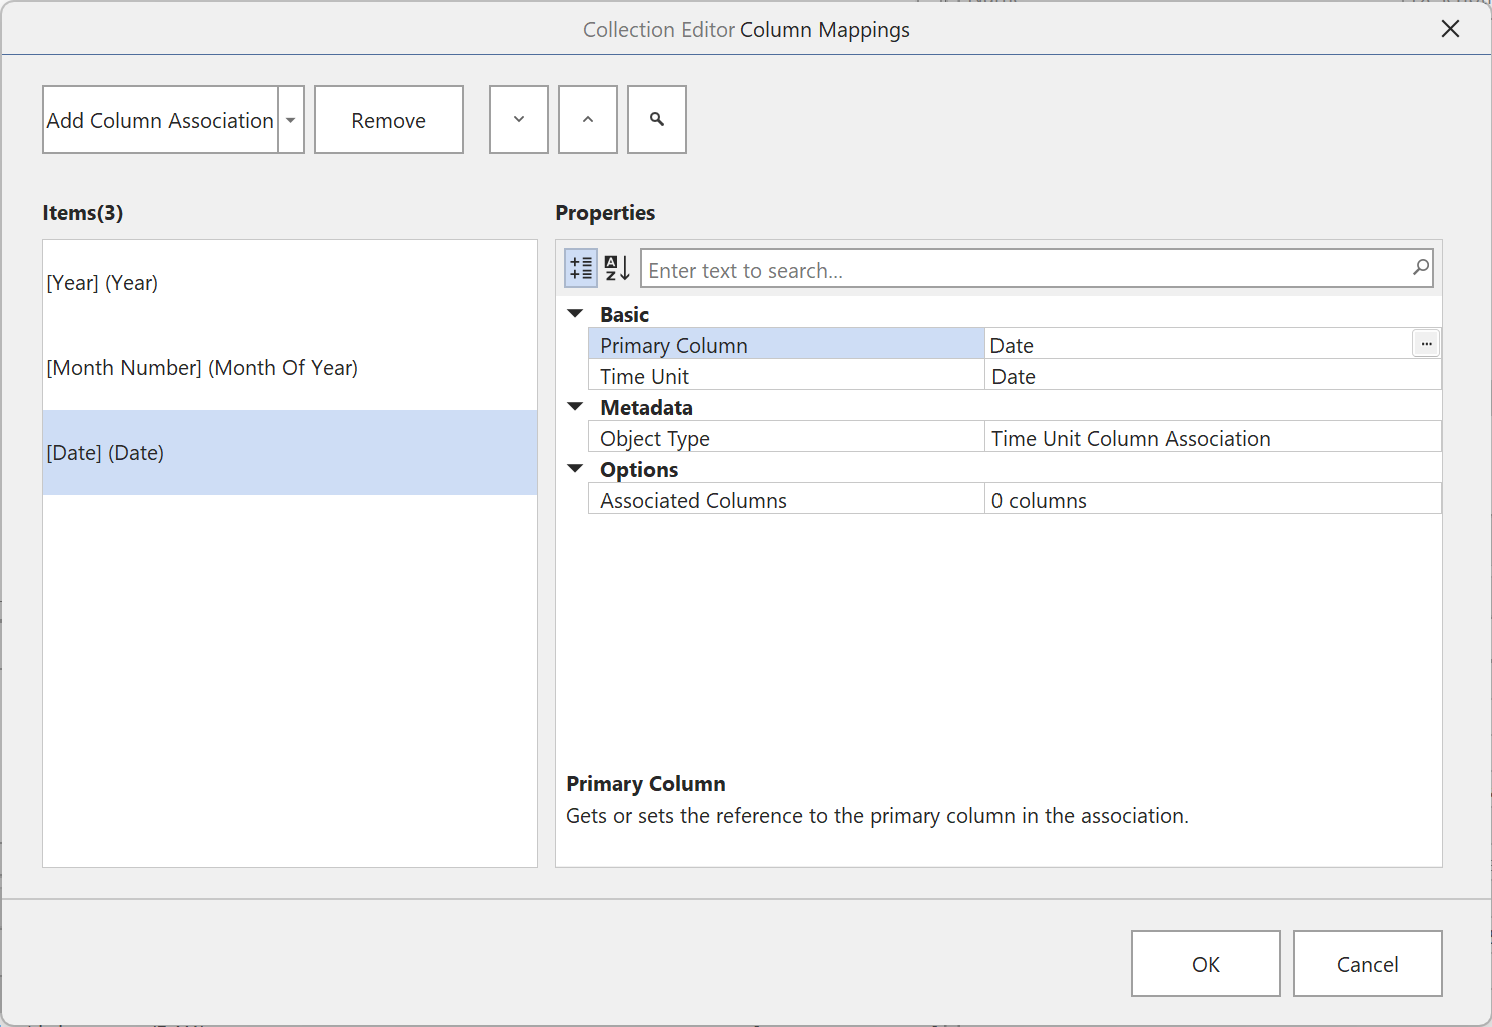
This dialog allows you to add column associations one at a time. Click Add Column Association and choose Column Association to add a new mapping. For each association, you select a column and assign it to a time unit category. You can also add additional associated columns for each mapping by expanding the Columns property.
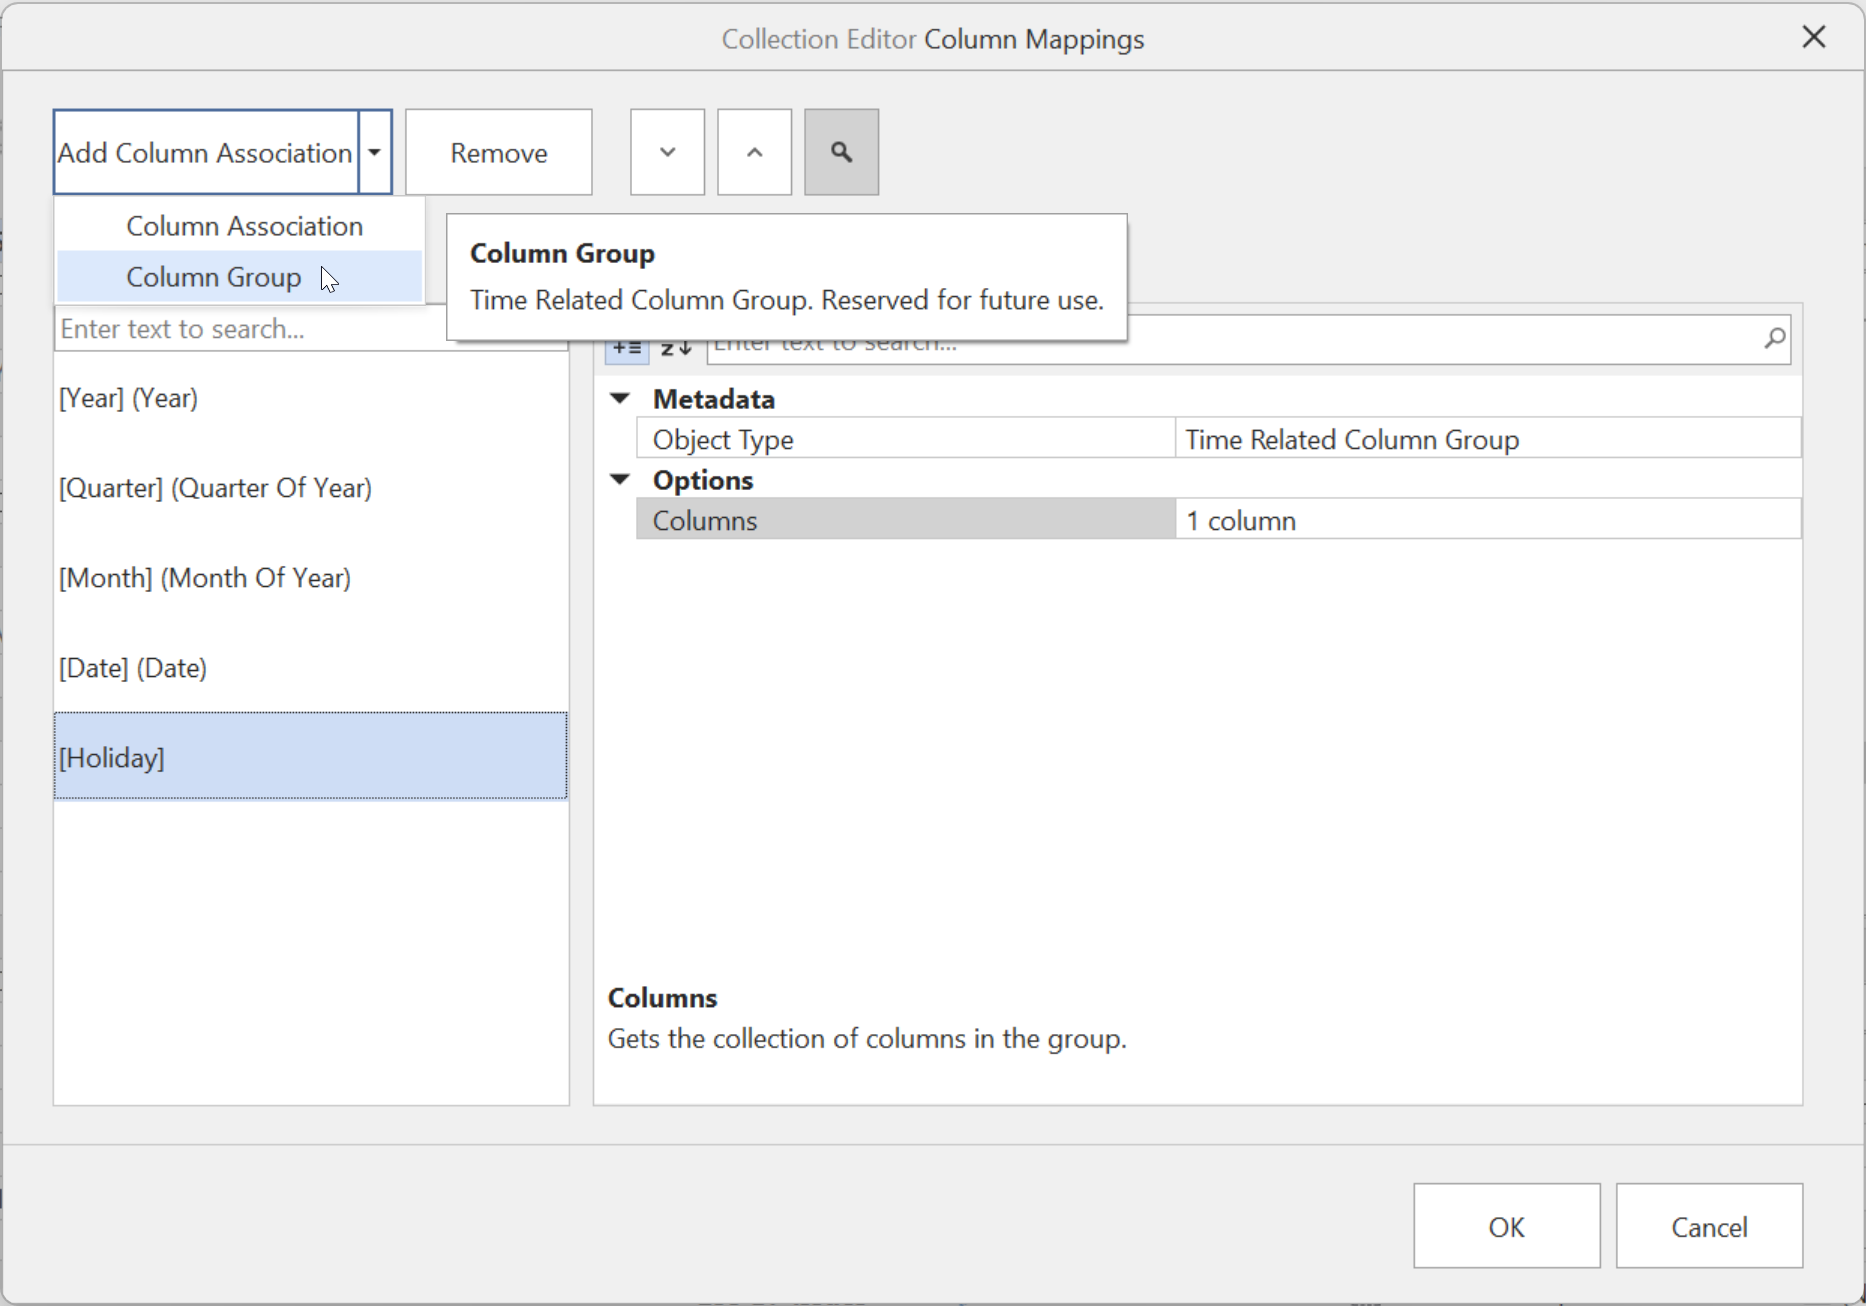
Adding Time-Related Columns in the Column Mappings Dialog
To add time-related columns through this dialog, click Add Column Association and choose Column Group. This creates a Time Related Column Group where you can add columns that should be treated as time-related (see Time-Related Columns for more information about how these columns behave).
The Calendar Editor is recommended for most scenarios as it provides a more comprehensive view of all time units, helpful tooltips, and real-time validation feedback.
Using Calendars in DAX
Once you've defined a calendar and mapped its columns, you can use it in your DAX calculations. Calendars work with existing DAX time intelligence functions that accept a date column as input (such as TOTALYTD, CLOSINGBALANCEMONTH and DATEADD).
Additionally, 8 new DAX functions for week-based time intelligence have been introduced. These functions exclusively work with calendars:
Click the links above to learn more about each function.